Sunday, April 6, 2014

Print a badge from BadgeMaker app

BadgeMaker v1.06 is published on PlayStore. The most important new feature is the ability to print badges directly from the app (KitKat only). Let's see how it woks!

First of all the size of the badge based on the size of the laminating pouch intended to use must be set in the "Settings" menu.


Google included the new printing services in KitKat. HP printer users have only to configure the included driver but users of other printers must install the appropriate service. I own a network attached Canon printer so I installed and configured the Cannon Network Service.

If no appropriate driver exist, the in KitKat included PDF driver can be used to print the badge into a PDF file. This PDF file can be copied to a PC and printed from there.

When all this is done, the printing can be started with the new "Print" menu. It is important to select the correct page size in the upcoming dialog.


The printed badge is surrounded with a tiny dotted line so it is really easy to cut it to the right size.


After the badge is cut out it has to be inserted carefully into the laminating pouch.


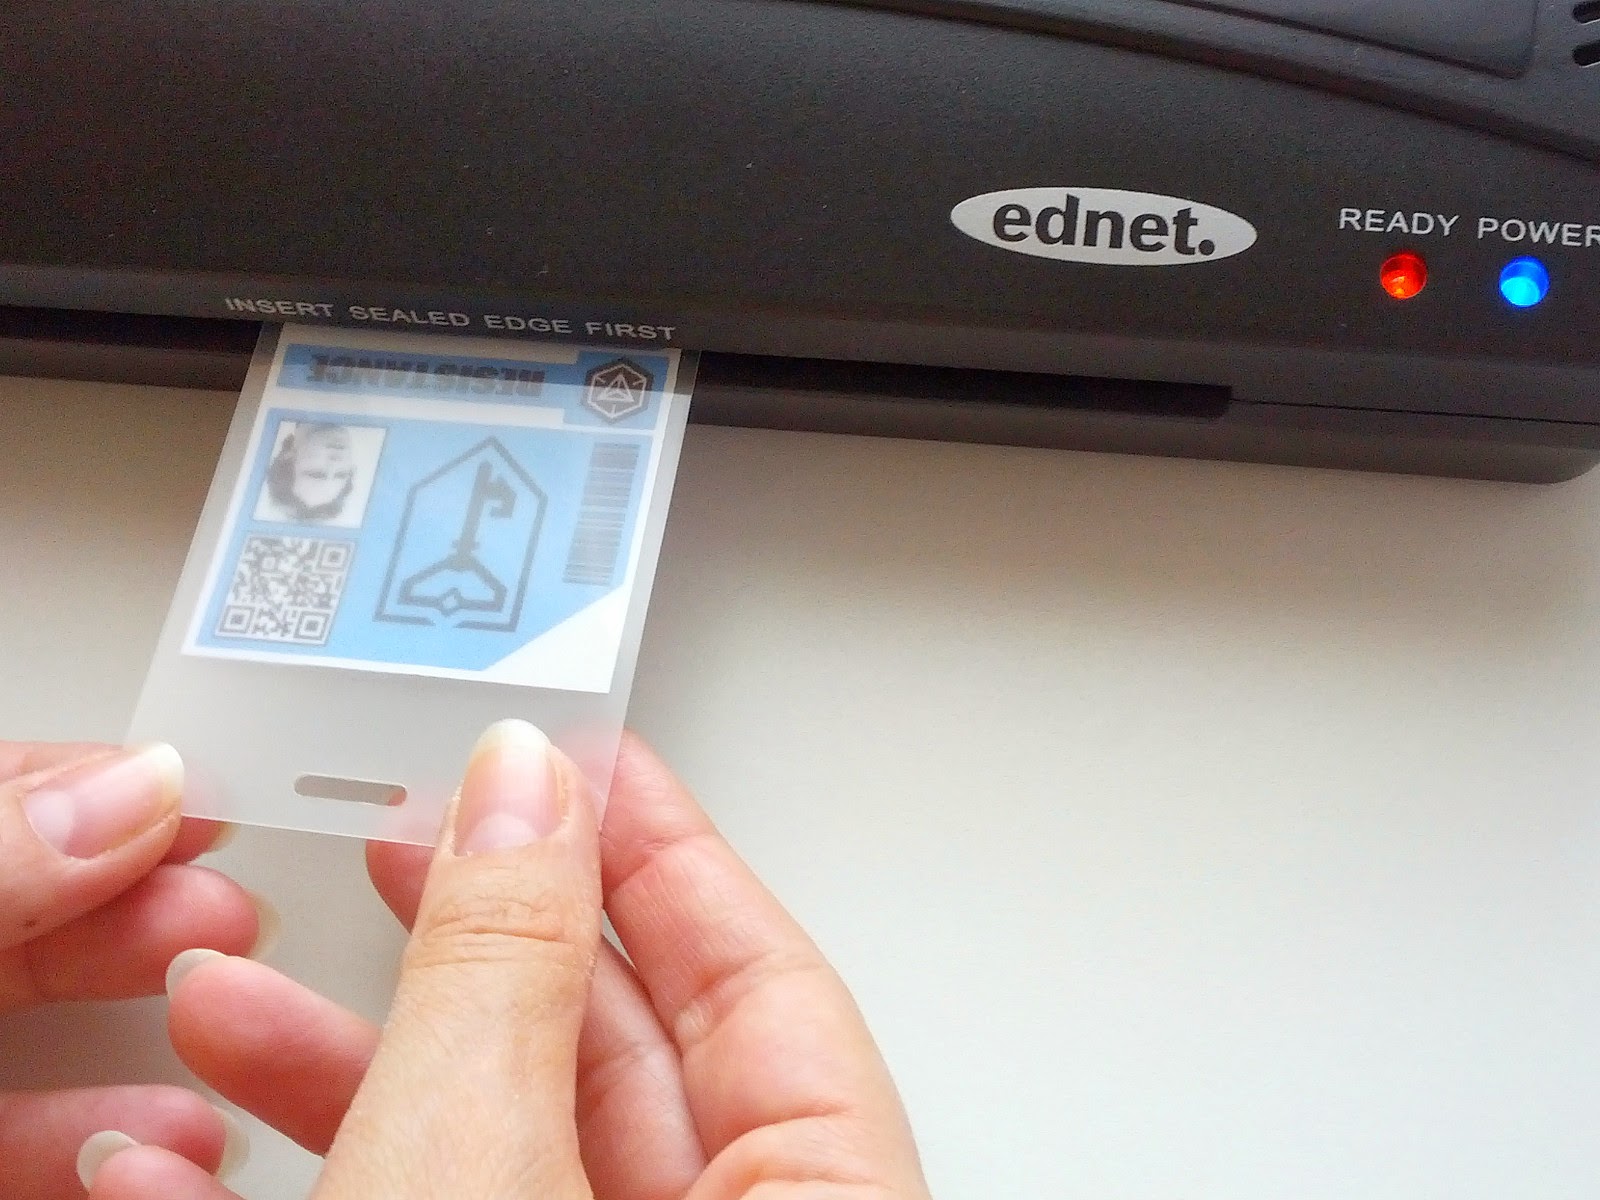
When it is done, the laminating can be started.


And the result:


I used the following pouches:

Tuesday, April 1, 2014

A nice enlightened badge

Agent G3ck0X posted me a photo of his nice badge created with BadgeMaker. The enlightened themed lanyard is also very cool... if you are an enlightened agent of course :-)

Thanks for the photo agent G3ck0X!


Monday, March 31, 2014

How to laminate a badge

The followings are the main steps to create a real badge:
  1. Create your own badge with BadgeMaker (please see my previous post to this)
  2. Copy your badge picture to your PC
  3. Print your badge
  4. Cut out your printed badge
  5. Laminate your badge

To badge creation:

The BadgeMaker app produces badges in the following sizes:
  • Free designs: 720x960 pixels (JPG or PNG) 
  • Unlocked designs (key app bought): 720x960 pixels (JPG or PNG) 
  • Non-Free designs: 360x480 pixels (only JPG)
It is recommended to save the badges in PNG format so no quality loss happens (however this can be done only with the free and unlocked designs).

The picture format can be set in the settings menu (before saving the badge):


Considerations for printing and printing size

I found laminating pouches for A7 sheets in the size 80x111 mm (3.15x4.37 inch) in our local OfficeDepot . This is a nice size for a badge.

Now let see, how the badge created with BadgeMaker fits into this pouch.

The badge has to be printed in 240dpi resolution. This means, that the printed badge will have the following sizes:
  • 720 pixel side --> 3 inch
  • 960 pixel side --> 4 inch 
The printed badge will be 3x4 inch which fits perfectly into the 3.15x4.37 inch pouch.

Examples

Here are some examples, how nice the laminated badges look like. Thanks for agent FreonHunter for the nice pictures!


A Badge Maker is born

This blog will be interesting for you...
  • If you play Ingress and sometimes you want to have a fun gamer badge with you to signalize the other agents who you are
  • Or maybe you take part on an Ingress event and you want to give something to remember for the involved agents. 
  • Or you just want/need to have your own personal Ingress badge
Some of my fellow agents asked a half year ago if I could develop a simple app to make ingress badges directly on the phone. So I started a little android project with the name "Badge Maker".

After the first version was born and 3 different badge types were included in the app I stopped the development because it was good enough for us. I never intended to put the app on the play store. But after a short pause I designed a new badge type. Just for fun. And a little later another. And so on.

Now there are altogether 10 badge designs in the app. I decided to make the app available for all agents in the world and I published the app on Play Store.

The app can be found here


How to use the app

1.) Select your own faction (buttons with resistance or enlightened logo on the left)
2.) Select one of the available 10 designs (buttons on the right)

The first 3 designs (Recursion, design 1 and design 2) are entirely free which means:

  • They can be saved in full resolution (non-free designs only in 50% resolution)
  • They can be saved losslessly in png (non-free designs only in JPG with 65% compression)
  • Background can be selected individually
  • No "Badge Maker free" logo

3.) Type in your own data (button with the T on the left)
 3.) Select a nice photo of you (button with the smiley)
 4.) Select a nice background (button with mountain)

5.) Push the save icon, and the badge is saved. You can send it to your PC, print it and laminate it as you wish.

ENJOY! :-)